


Note: This is the third in a series of articles that appeared in Car Craft Magazine about the process of designing and building your own fiberglass bodied sports car.
Car Craft published one of the most detailed series of articles ever to appear on this subject, beginning in October, 1954 and culminating in February, 1955. They went on to cap this series by publishing a “Buyer’s Guide” for fiberglass sports cars in March, 1956. Click here to review this special final article by Car Craft Magazine – one presented here at Forgotten Fiberglass in 11 separate stories.
All in all, this is an amazing series of articles published during the golden age of designing and building your own fiberglass sports car – a window into the 1950s like no other. Click here to review each of these stories on Car Craft’s “Building Your Own Fiberglass Sports Car” here at Forgotten Fiberglass.
————————–
Hi Gang…
There’s a lot to cover in this article which focuses on building the plaster splash female mold. Let’s jump in and see what Car Craft Magazine had to say about this topic – here on Forgotten Fiberglass.
And away we go….
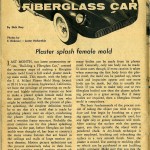
Building a Fiberglass Car
Part 3: The Plaster Splash Female Mold
By Ray Brock
Last month, our latest construction series, “Building a Fiberglass Car” covered the necessary steps of making a fiberglass female mold from a full scaled plaster mock-up male mold. This month, with the help of the J.A. Milani Plaster Mold Shop, located at 9814 Irwin Avenue, Inglewood, California, we have the privilege of presenting an exclusive and highly informative feature on how to make a plaster splash female mold from the same mockup.
For those of you who might be unfamiliar with the process of plaster splashing, the simplest definition would be to say that it’s a mold that is made by splashing plaster over an object, reinforcing the plaster (before dry) with fiber hemp and a wooden frame structure.
Probably the most common use for this plaster splashing process, in the past, before fiberglass car body molds were thought of, has been to construct the many ornate fixtures that are found in the ceilings and walls of large motion picture theaters.
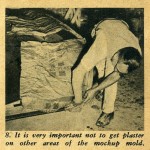
Motion picture technicians use this process extensively today in their business for creating special motion picture effects and prefab set designs. The popularity of the process with backyard fiberglass car builders has grown considerably because of its low expense when compared to the price of making a fiberglass female mold.
Though less expensive than the fiberglass mold, it still has restrictions on how many bodies can be made from its plaster mold. Generally, only one body can be made. In some cases, though, if extra caution is taken when removing the first body from the plaster mold, the mold can be patched up, where crack and impurities appear and one more body can be made, but this is usually the limit.
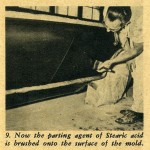
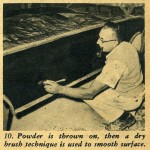
If you wish to make only one or two fiberglass bodies cars then the plaster splashing process is a great savings. But if many bodies are required, then a fiberglass female mold is compulsory. The basic fundamentals of the process consist of taking the object you wish to reproduce and first begin by brushing on a parting agent.
Stearic acid is generally used, but any light oily or greasy substance will work. After coating the surface with the parting agent, you then sprinkle the object with a powdered chalk. A dry-brush technique is now employed, brushing and rebrushing the surface to a very smooth finish.

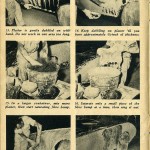
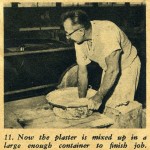
Next, the plaster is mixed. Use casting or molding plaster which can be purchased at any building supply company. Make sure that you mix the plaster in a large enough container which will allow you to finish a complete section of the mold at one time without mixing any more material. A large dishpan usually works out fine.
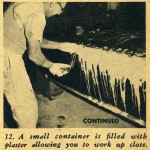
The consistency of the plaster should resemble thick mild. Now, take a small container such as a one-pound coffee can, fill it with the plaster solution and, by holding it close to the object to be plastered, dip your hand into the plaster and begin to dabble the plaster onto the surface with your hand.
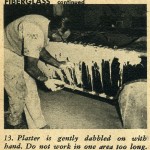
When we say dabble, we mean for you to use short, light strokes with your hand and the plaster, similar to that of women sprinkling clothes before ironing. When working on a vertical surface, such as the side of a car, the plaster will have a tendency to slide down the surface, especially when you get too much plaster into one area.
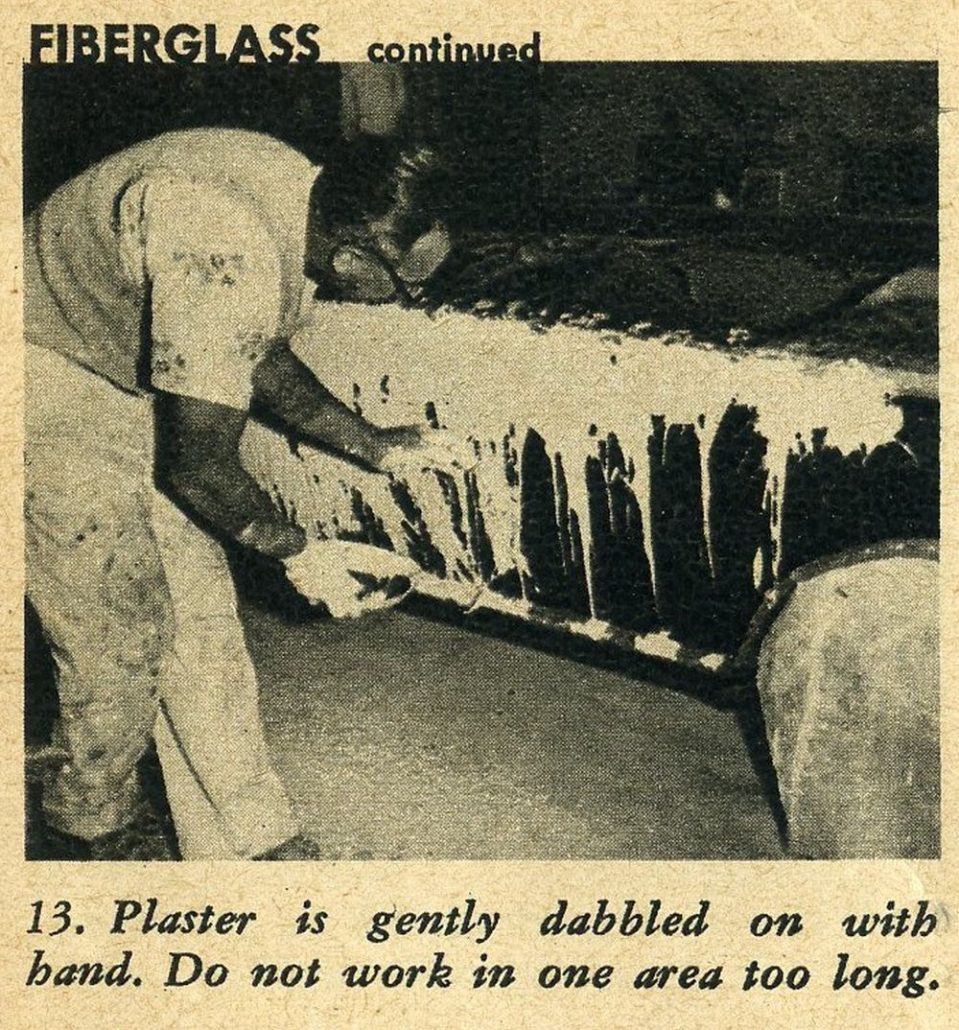
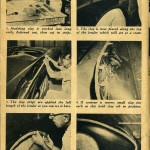
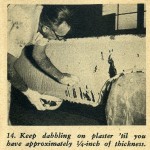
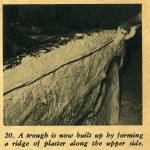
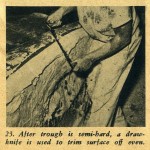
Work the complete surface over very lightly at first, coming back to where you first started and then repeat the application. Keep up this dabbling application with the plaster ‘til you have reached approximately a 1/8 to ¼ of an inch thickness. When this thickness is reached you will then start applying the hemp fiber.
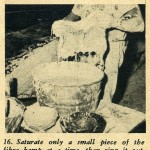
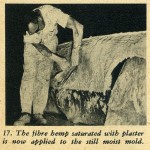
The hemp fiber can be purchased at a building supply house the same as the casting plaster. The method used for applying the help is: first tear off a section of the hemp and saturate it in the dishpan of plaster; next, remove it, ring it out and lay it on the still moist plaster surface of the mold; spread it out flat and with a very light patting action with your hand, working the saturated hemp into the moist surface of the mold.
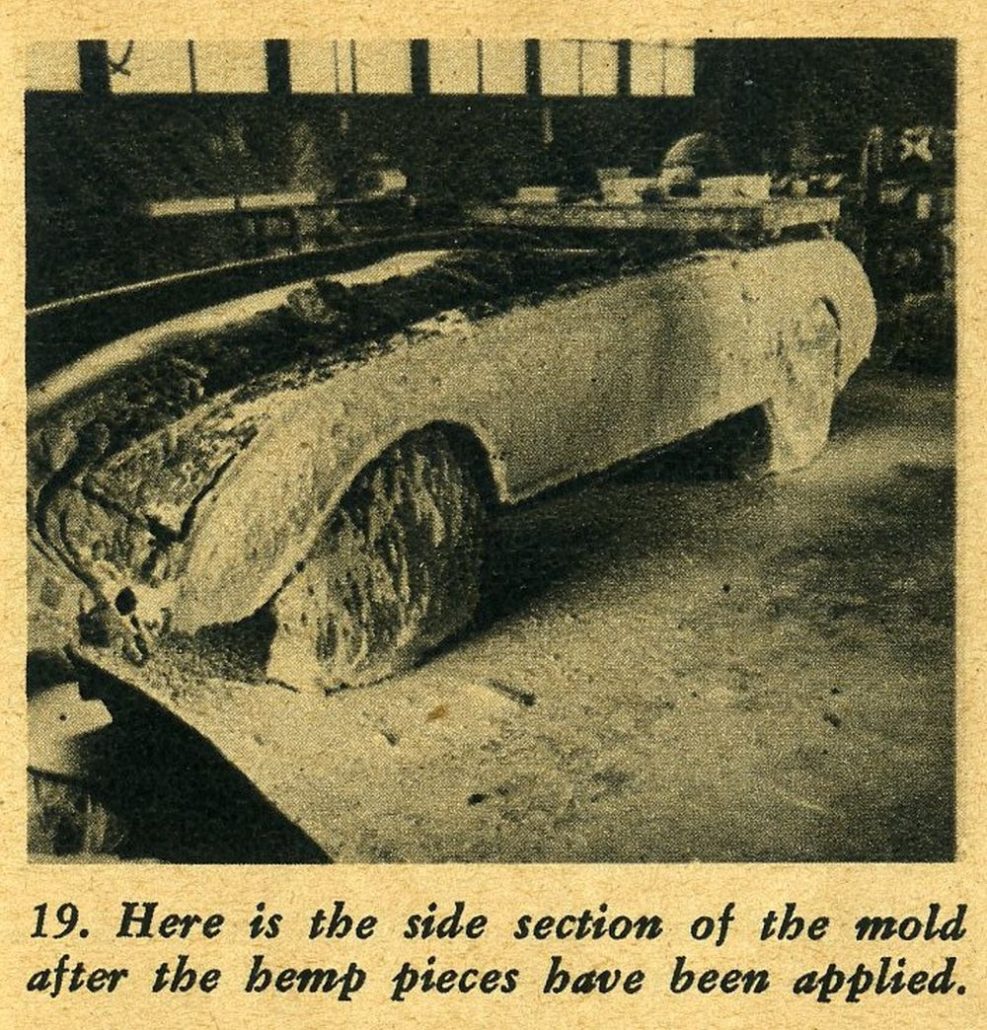
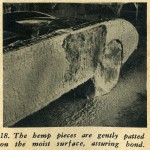
This patting action is used to fuse the two layers of plaster together, the plaster you put on by dabbling and, now, the saturated hemp layers. Keep applying the small sections of the saturated hemp ‘til the complete area is covered. One layer of the hemp over the surface is sufficient.
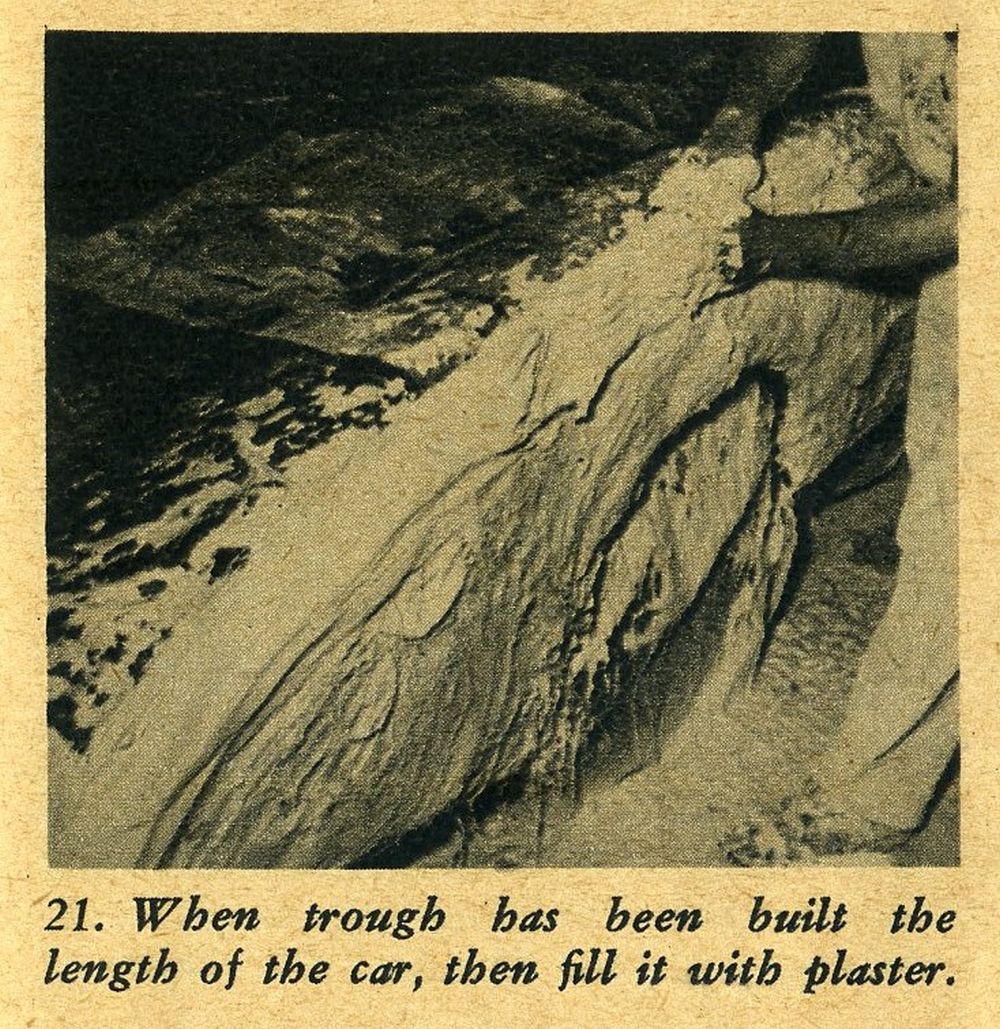
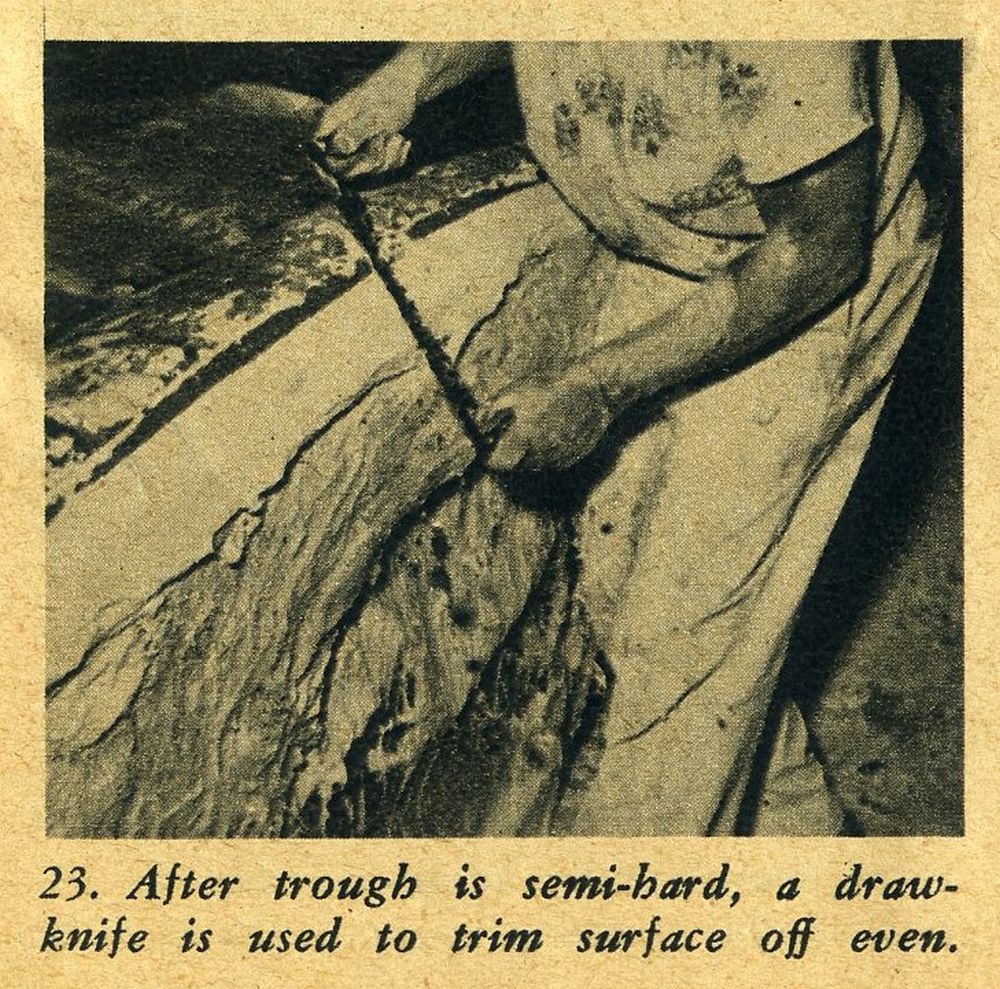
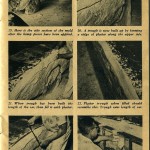
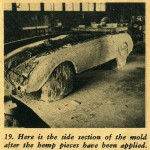
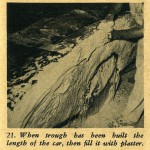
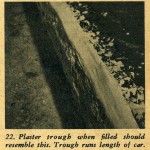
Now comes the wooden framework that is made up from 2×4 lumber. The framework should be long enough to run the distance of the mold. The framework is placed up next to the side of the mold or over the top, whatever the case may be, and is tied to the mold by making up saturated hemp stringers. The following photo story will illustrate this particular operation.
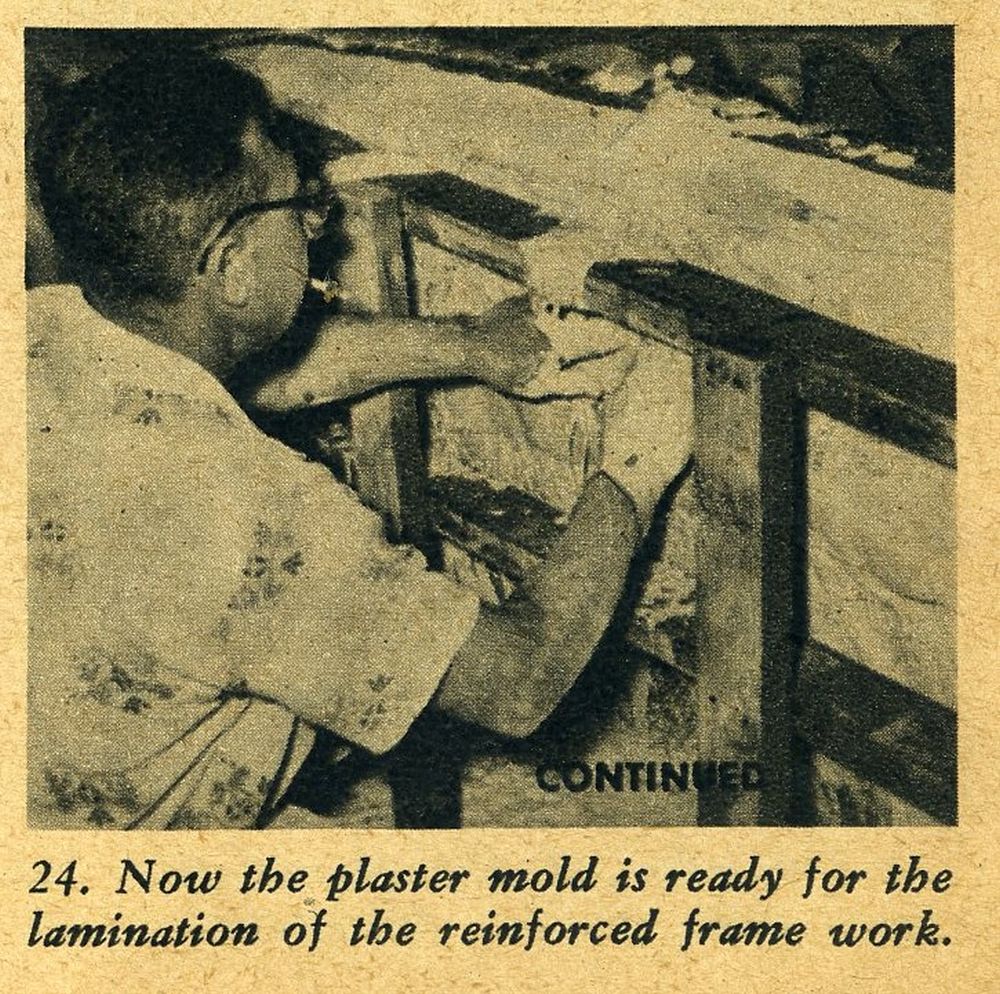
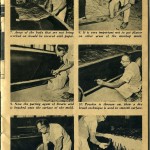
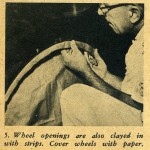
When an object as large as a car is undertaken, it is generally compulsory to make the mold up in sections. The sides are treated separately, the front end and tail end are separate sections and the top constitutes another section.
The illustration showing how to section up the car and how the sections overlap one another should be given considerable consideration before attempting to plaster. No one section is removed ‘til the completed mold has been plastered, then they are removed one by one from their various positions.
The mold sections are actually designed to interlock with one another so that when they are removed, piece by piece, from the mockup they fit back together again with specific positions. Pay particular attention to the femal and male key locks that are incorporated into the overlapping edges of the sections, allowing the mold to be put back together with perfect registry.
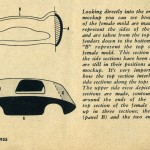
Our following photo story illustrates how the plaster splash mold is made by using one of the sides of the mold as a working example. Actually all the sections of the molds are made in this same illustrated manner. For instance, first you make one side of the female mold. The next step is to make the other side.
Leaving both of these female mold sides next to the male mockup in their original positions, go to the top of the male mockup and start making up the top female mold sections. When all of the sections are complete, let the entire female mold dry thoroughly while still on the male mockup.
When dry, the top section and end pieces are removed first, then the two side sections. To set up the mold for use, you turn it in an upside down position, making sure that the various sections register with one another and nail and wire the whole female mold together.
Although plaster splashing process is a simple and inexpensive method, it still requires basic steps to be followed. Between this copy and the following illustrative photographs, this job should be a simple one for you backyard fiberglass car builders.
Summary:
Hold onto your fiberseat gang…our next article in this series will cover molding the glass body. And you thought the hard work was over 😉
Hope you enjoyed the story, and until next time…
Glass on gang…
Geoff
——————————————————————-
Click on the Images Below to View Larger Pictures
——————————————————————-


Thumbs up for your article. Thanks for the great information you have explained right here on this post. I would visit this site more often.
Drop by at my site too and learn more about building inspections Melbourne.
Awesome post! Nicely presented information and I find it very interesting. The quality of content is fine and the storyline is good.
Excellent post, one of the few articles I’ve read today that said something unique! Thank you for sharing.
click here
Very interesting article that you’ve posted. Found the views to be quite informative and intriguing. Thanks for sharing.
excavator hire melbourne
Very interesting article that you’ve posted. Found the views to be quite informative and intriguing. Thanks for sharing.
plumber malvern
Nice post! I am glad that you shared this useful information with us. Great job!
antenna installation melbourne
Great post! I am happy that you shared this useful information with us.
excavator hire melbourne
Thanks so much for this flawless article;this is the kind of thing that keeps me going through out my day. I’ve been searching around for your site after asked to visit them from a colleague and was thrilled when I was able to find it after searching for long time. Being a avid blogger, I’m cheerful to see others taking initiative and contributing to the community.
I just wish that I could have been a fiberglass apprentice back then. If I had the shop space and time today, I’d have to create my own design, mold, and body.